

As a mom, it is my job to come up with fun ideas for my 5-year old daughter to do, so that she'll be able to fondly look back on her childhood, and not be able to recollect a single "I'm bored" moment. (And where I can look back without having to encounter all of the you-never-did-anything-for-me's and I-hate-you's that I have, when my oldest became a teenager!)
It was last Easter, that my youngest began this collecting obsession with a doll line called Lalaloopsy, after the Easter Bunny missed the boat on a miniature version, named "Cotton Hoppalong" to throw into her basket.
These creepily adorable little things with a blank stare and empty smile, look like the spawn of that "Other Mother" character from that movie Coraline. I've been caving though, and making sure my daughter is all caught up on this little collection. And it's because of this, that I thought how nice it would be to work on a dollhouse project with my child.
So, I went to the local Michael's and came home with:
- Creatology 'Dollhouse With A Veranda' ($8)
- A bag of sparkly jewels (from the back wall) (@$3)
- 3 tubes of acrylic paint (for the roof, trim, and body) (@)$3)
And from another store (the one where they are known for lower prices):
- One can of Minwax Polycrylic Spray ($10)
- Fabric biased tape (to cover corners and rough edges) (@$2)
- Paint brushes (@$3)
- Superglue (@$2)
- Ribbons, miniature roses, buttons, etc. to dress it up
Other things to have on hand: Exacto knife, nail polish remover (to loosen up the superglue, when at 2am, you realize that you poured half the tube into your palm),
Punch the pieces of the puzzle out, and lay them as they were in their original frame:

Begin, by painting the pieces of each sheet with 2 (or 3) coats of acrylic paint. (Making sure you do the backs of the railings and trims, as those will be in view, once the house is completed.) After the paint is dried, spray 3-4 coats of the polycrylic over the pieces. (Do you remember how scratchy the art projects in elementary school felt with acrylic paint? This process will smooth it over.) This part will probably take about 3-4 hours-- especially if the puzzle is already looking greek by now! (By the way, acrylic paint is totally washable from finished surfaces-- like my wood table, as I found out. But since I have a carpet underneath it, this project ended up more as a Mommy one. ("You can help by decorating it with your furniture" I had to tell my 5-year old.)
When the paint is dry, grab the floor, ceiling and wall pieces and your scrapbook paper. Piecing together where the walls will run, measure and cut your scrapbook pieces out, gluing them down. (Double--no. Triplecheck your placements, making sure you are not gluing a floorpiece to a ceiling!)
 |
| You'll see how you'll need some bias tape to get all the gaps that show. |
When that part is completed, look over the directions, as they might be hard to interpret. (All it shows is a layout of the pieces, where tabs and notches are numbered.) But after piecing the walls and floors together already, the process will probably become more self-explanatory than anything. (Afterward, cover any gaps, and line the edges (where the walls and floors meet), by gluing bias tape (which is already folded), over the edges.)
What I found by finishing the pieces before assembling does, is that it provides a tighter fit, so the pieces don't fall apart once you pick it up. (Hence why this is my 2nd house-- not the first! ;) When I finally put the little wood locks in place, I was then able to decorate the house until 3am. Suffice it to say, I ended up getting three hours of sleep, because at 7am, my daughter came in, wondering why I wasn't awake yet.
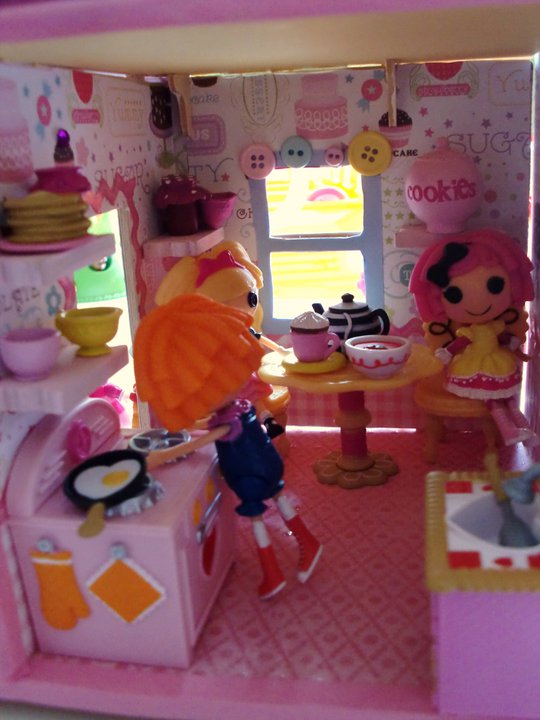
But here is what the interior looks like:


For the $8 base price (which is all I had to pay, because I already had the other stuff laying around from another hobby that didn't take off-- scrapbooking), it's not like you have to worry about messing up too badly on it (like an expensive kit). But it's something to help jump-start the imagination, where your child can customize a dollhouse into something of their liking without breaking the bank.
Have fun!
(**Note-- The front door actually had to be cut out, with scissors, as it doesn't come with an opening for one. To do this, match the door piece up with the windows, and trace it. And carefully, cut the opening out.)