Sunday, August 28, 2011

Posting A Pic Of My Kitchen Is Like Being Asked To Undress At The Doctor's Office!

It's something that I don't like doing.  I mean, my husband doesn't even see me.  And as the aparment is also supposed to be a reflection of who I am as well, not many people see it either.  (Can you tell that I have issues?)  But, whilst everyone is posting pics of their gorgeous kitchen redo's on their facebooks (and blogs),  I am confined with my apartment one, complete with very limited potential.  As I try to feel inspired by watching apartment-themed movies like Breakfast At Tiffany's (and some movie I saw the other night with Sandra Dee and Bobby Darrin), I am left disappointed, as I find not one single hint of european cabinetry anywhere.  (And yes-- I know that stuff didn't come out until the late 70's/early 80's!)

So, how can I change this~


Into something like this~


Or~


Or even this~


Exactly.  You can't.

(Okay.  Don't scroll back up and judge.  It was cluttered that day.  And when you have european cabinets, they make everything look like crap!)

When I was a teen, european cabinets were the "in" thing-- along with the Miami Vice-inspired glass bricks in your bathroom.  (Fortunately, I have been able to escape the latter!)  Back in the day, rich classic woods were made for old people.

Now that I am old, I want them.  And I can't, because circumstances (aka not being a homeowner), has prevented me from doing so.  Rich wood.  Yes.  Joke all you want.  (It is something that this apartment and my husband lack.)  But what do you do with these ugly things?  I mean white laminate? It's all throughout my apartment.  (The kitchen, and the two bathrooms.)  I've tried looking up ideas to camouflage them, but there's nothing that one can really do.  Since it's not a condo, it's not like I can rip them out (let alone even afford to) and get new ones installed.  I can't stain them, because the bedroom, bathroom and closet doors are done in that ugly blonde oak color as well.  And contact paper?  I scoured the internet, and the ideas I came across were... well... uglier than the laminate itself. 

So, kitchen idea  No.1.  Use them as a canvas, and accentuate the other things going on in there.

Border's Books is having a clearance sale.  And mind you, the store isn't just books.  It's full of wrapping paper, toys (which thankfully, they were mostly out of the other day), fixtures, etc.  While my husband felt compelled to get Rob Zombie's Halloween Two and a Grateful Dead scrapbook thing, I went over to the area where the picture frames were.

Now, I should have waited a little bit longer for them to reach 75% off.  But usually when I go this route, I go back and whatever it is that I wanted is no longer there.  So, I settled for 50% off and went home with my first step forward into my little kitchen redo:


(I'm planning on getting rid of that tile on the back oven splash wall area, and replacing it with some kind of mirror.)


The little pantry on the end, I have plans on painting an antiqued/rubbed black, and putting a better knob on it.  The recipe shelf on the refrigerator, I am thinking about doing the same.  Oh-- and that hideous overhead fluorescent?  DON'T REMIND ME!!!


This shows the layout.  The dining/kitchen is split.  (And don't worry-- those ugly lamps are the next to go!)

Overlooking into the dining.  Unfortunately, it would probably be best to keep that 100-year old corner inheritance the way that it is.  But I am planning on redoing the breadbox in an antiqued/rubbed black as well.

Of course, I had to go into my recently-discovered Picasa mode-- because you can make things look all glow-y like.  (Which is so neat, because...  well... I'm an idiot when it comes to technology!  But it makes everything look a little bit better!)

I purchased the frames (at $9.98 each), because they were already finished.  (This way, I wouldn't have to bring out that cutting board onto my dining room table again, paint it (in what would probably the wrong shade), and just end up spending more than I had intended.)  They weren't exactly what I had in mind (I was thinking a little bit longer), but throw some of those 3m Command picture hanging strips on the back, flip the brand label over to the blank white side, and voila!--  you've got a dry erase board.  A temporary fix to a permanent problem: 


Again, warm glow-y hue!

And I'm assuming you don't necessarily have to make this a dry erase board-- it's just what came in as the cheapest for now.  You can go out and by a $10 can of chalkboard paint, and you've got a chalkboard.  Slip a piece of black scrapbook paper behind the glass and get a $5 marker, and you've got one of those menu boards like they have at the restaurants.  Maybe even a mirror (which might go for the shabbier look, and it would reflect the light coming in from the window opposite of this wall)...  But like I said, this was the cheapest fix for now.

So this is Kitchen Babystep No.1.  I detest baby steps.  I wish I had a few hundred dollars to go out and do what I want with this place, but unfortunately, I don't have those rich woods that are required!  But I will be posting more as I go along.


Wednesday, August 24, 2011

I Don't really Cook, So Why I Even Have One Of These...


Since starting this blog, I've realized that in order to get some traffic onto my page, I need to well... actually do some things.  Right now, my husband's asleep with a humidity-induced migraine, so I'm sure he'll appreciate waking up to the fumes from the paint and varnish, wafting into the back room on top of a 90 degree forecast!  Again though-- oh, well!-- I need to get this thing going! :)


(Nevermind the paperpunch thing-- it's from another project.)


For the past year, I've had a plain, hinged box, specifically made to hold recipe cards.  I've never known what to do with it (as far as finishing and decorating it went), and because of that, it's been left, unfinished on my kitchen counter.  And as the title states, I don't cook that often.  (I usually let the microwave do it for me!)  I do though, have some recipes that I've used for special occasions, along with some my mom left for me.  So, putting them away in a nice little place would be nice.


It's one of these kinds of boxes.  (I forgot to take a pre-photo of my own before I started this project.)
It's not like I haven't have ideas for it.  I have, but I could never settle on a finish.  But I really love espresso.  The thing is, though I've got all these other eclectic mixes of woods in my place, that I don't want everything mismatched.  (For example, I've got this cherry corner cupboard that my mom left me.  It drives me absolutely nuts!  I inherited that, along with a cherry (I think) cookbook shelf and spice rack.  They go with absolutely-- NOTHING!) 

But realizing this morning, that I've been fretting over a $2.50 box all year, I decided to make the sacrifice, and try for something in an espresso finish that I like.  Even if I fo screw it up, it'll be a good excuse to go back to the craft store to get this mdf box that I saw...

What is my inspiration for working on this today?  Looking for ideas on the web, and coming across a few recipe boxes that were probably purchased for the same price, done up pretty, and are now selling for almost $100. 

(I'm sorry-- but really?)

You can find the basics on how to finish the box on here:  http://notenoughcalgon.blogspot.com/2011/08/tic-tac-toe-apparently-without-kiddo.html .  And don't worry if you don't get the perfect finish, because I didn't.  It goes with the shabby/antique-y thing that's going on with it.  (I don't have a printer, so I had hand-write the Recipe label myself.  Again, that's alright too, because you don't want it looking like it came off an assembly line.) You can also customize it, by lining it with scrapbook paper.  However, keep in mind that by doing so, it will take up some of the space for the cards.  (Plus, you don't really see the inside of it anyways.)  But it would add a nice touch to add on the interior of the lid.)

If you go to the craft store (Michaels or Craft Warehouse), you can find a lot of embellishments in the scrapbook aisle.  For me, I already had a few small frames and then I found these utensils at the same time I purchased the box.  (And of course, you can streamline it with borders, raffia, etc.  But I did it minimally, because I'm actually going to use it, and had to consider it getting bumped with dishes, groceries, etc.)
(Hmm... I suppose you can even finish it by gluing balled feet on it.  But I'm going to stop at here for now.)


Using Glossy Accents, I dropped it over the 'Recipes' label, to protect the ink from ever running from exposure to water, etc.

A project under $10 (if you don't have the Glossy Accents on hand), and just another idea on what you can do with those boxes at the craft store!

Ps-- No fumes!
 

Sunday, August 21, 2011

Tic~Tac~Toe (Apparently, Without The Kiddo!)


The other day, I saw a tic-tac-toe project at the craft store.  It came across as intriguing (as it was only a few days before, that my daughter decided to raid my desk drawer of cardstock and play several rounds of the game herself (with one of her dolls). I viewed it as a neat project the kiddo and I could do together, so I bought a few things, and planned to put it all together this weekend.

But the thing is, my 5-year old is too girlie.  This little thing does not run around our home like a normal kid her age.  She pirouettes while doing it.  For the past month, she hasn't been speaking to us in her regular teeny voice.  She's been singing every word-- in vibrato.  Everything has to be pink-- right down to the color of her toothpaste.  (And she finds it comical that although Mommy finds it impossible to walk in anything higher than 1", she can parade around in Cinderella play heels like she was born in them.  She particularly likes tapping in them as well (in the bathroom with the heatlamp on, which she calls her "spotlight"), which must sound absolutely lovely to the neighbors below.)

So back to this project.  The moment I mentioned the word "glue", she gave me a look of "um... uh...  I don't do glue".  And because of that, I was given another project to do by myself.  (Minus the "o" part of the game-- she did that herself to make it seem like she was involved.)

To do this project, you will need the following:


  • Delta Ceramcoat Gloss Interior Varnish
  • Paint or stain of your choice  (I had some wood stain, that I added a couple drops of black acrylic paint to, to give off that hard-to-find espresso finish.)
  • Glass (gawd!  What are those things called?  They're the ones that they sell in the bag, that you make magnets out of...  can't think of it right now.  Pebbles?)
  • 1" paper punch  (I got the Martha Stewart one, because I didn't want to mess with a cheaper one, and pay for it, by having the paper get all caught up in it.)
  • Vinyl tic-tac-toe stickers  (sold at the craft store with a website called http://www.vinylwords.com/)
  • Decoupage glue (again, Martha Stewart)-- to glue the paper to the glass drop things.
  • 1 4x4 piece of sheet metal
  • 1 wood square
  • 1 box (optional) for storage
  • Scrapbook paper (to cover the sheet metal and line the box with)  (Make sure that the background of the game and pieces are not to loud to distract the x's and o's.)
  • Sandpaper-- fine grade
  • (There should also be some round magnets pictured, to superglue to the back of the 'x's and 'o's, but I can't find them at the moment.  I usually keep them in a desk drawer, but I found a couple of old cassettes from my high school days, that I didn't want getting erased by them with.  So right now, I can't remember where they are-- just like my driver's license that I haven't seen since last Saturday!)
First what you want to do, is make sure all the sides of the wood are free of little splinters that will dry up hard, leaving a poor finish.  So before you start, make sure they are sanded with some fine-grade sandpaper.

Paint or stain the wood pieces, in the style that you want.  (To get fancy, you can paint it one color, then paint over it with another.  And then with the sandpaper, run it across the edges and whatnot to give it a 'vintage' or 'shabby' look.) 


This is my workspace.  The dining room table with an oversized cutting board that was too big for my kitchen.

When the painting is finished, get a spongebrush (that I forgot to mention), and use it to glide the varnish across the surfaces, making sure there are no bubbles; about 3-4 coats.  (While waiting for the wood to dry, cut and measure the scrapbook paper, gluing it onto the piece of sheet metal.  And then punch out 8 pieces of scrapbook paper out (4 each of two different patterns), adding the x's and o's, and gluing them to the pieces of glass.  When dry, superglue the magnets onto the back.) 


When all is dry, your child might get upset at you, wondering why you didn't let them do all the painting.  (Like mine just did a few minutes ago, while I was typing this up.)  Ignore it, and tell them that you are trying to pay bills online, so they can see that you can't be bothered right now.  (It wasn't going to happen anyways, being that there is carpet underneath this table!)

Anyways...

When it does get dry, glue the sheet metal onto the wood, and measure and cut (preferably using an exacto knife and a ruler) the scrapbook pieces to the interior of the wood box (if you're making that, too).

This project took about a couple hours to do (because of the drying time involved).  But if you have ones that are a little bit older, it might be a neat project to do to give away as a gift, or a display piece.

With that said, goodnight!


Saturday, August 20, 2011

What NOT To Do On A Hot Summer's Day


It's officially 95° degrees outside!  All my hopes of having record lows of under 80 temps all summer long, are now dashed with an even hotter forecast in the upcoming week.  And what am I doing right now?

Heating up my darn apartment, making cookies!

Why?  To fill up some more space on this blog of course!  Hopefully, someone will come along, and find something interesting to refer others to.  Because if they don't, I just slaved over a hot oven for nothing!

These cookies are GREAT!  They're buttery.  They're sweet.  And they make your home smell like you actually did something while your husband was at work.  (Although mine probably won't appreciate the fact that our place is now a few degrees hotter than it actually is outside now.  Oh well...)  But I like making them, because they are quick (as in everything is already in the Bisquick-- making it a one bowl/ one measuring cup mess (which I can totally deal with).

Buttermilk Candy Chip Cookies (A Variation On What's Probably Already Out There)

Prep time:  about 10 minutes  Yield:  About 2 1/2-3 dozen cookies
Level:  So easy!

  • 1/2 cup (a stick) of cold butter (As I'm making these, I am trying Golden Soft margarine for the first time, and they are looking really good coming out of the oven!)
  • 1 cup packed brown sugar
  • 1 egg
  • 2 Cups Reduced-Fat Bisquick
  • 1/2 cups walnuts (optional)
  • 1-2 cups candy chips (depending on how much your wisdom tooth is killing you at the moment-- white chocolate, milk chocolate, m&m's, etc.)
  • Parchment paper (I totally recommend this!  It's a nonstick dream!)
Preheat oven to 375°.  (Which on days like today, will bring up your home's temperature up to 86°-- with the portable a/c running!)  Mix butter, sugar and egg together.  Then mix in Bisquick, nuts and candy chips.


Drop by teaspoonfulls (I got one of those ice cream scoopers, because it's a lot easier), onto a parchment paper-lined, or ungreased cookie sheet.


Bake 10 minutes or until lightly browned.  (Best bet-- use a pointed pie spatula (over a squared one), to gently nudge the cookies onto a cooling rack.)  And enjoy!

                                          Photobucket


Friday, August 12, 2011

Workin' The Fields!


One day, I'll end up with a nervous breakdown, where I will have this overwhelming urge to learn how to make my own jams and jellies like my mother once did, yelling at us kids to get out of the kitchen and play outside.  I always thought of doing this myself, adding my own little touch of covering the lids with a cute little gingham fabric swatch, and finishing it with a ribbon.  But until I can afford to scoff at the $100 pricetag it would probably cost to start such an adventure, I think I will stick with Smucker's instead.

Nonetheless, I could not rob my little one, the fun to be had, in picking berries at a u-pick farm.  So I've been thinking of turning these little trips into part of our summer traditions now. (Especially when trips to the beach are a joke right now, because of the money-- or lackthereof!)  As a child, I can remember my mother dragging my younger brother and I to one of those places, and how I would stand around and pout in the hot sun about it.  (Apparently, you could still make money back in those times, and maybe my mother needed some extra gas money or something.)

But times are different now.  I love raspberries.  But I hate the prices at the grocery stores.  I mean, $4 for a teeny plastic container?  That's INSANE!  So last summer, I came across the novel idea of taking my youngest to a berry farm to see how much we could save.  I ended up bringing 3lbs of them home, for just $2.50.

And it's not that big of a deal really though.  (Unless you end up taking a giant container of berries home, and can't really figure out what to do with them all, since your little one complains that there's "too many seeds" in her smoothie.) But it's a good break from all the screaming and yelling that goes on at the park.  Like a kind of meditation for you and your child.  And it also gives them the opportunity to see where some foods come from before they are processed in a factory, and spread on ice cream later on!

Ps-- I found out how to freeze berries.  A friend said that you spread them out on a cookie sheet, and freeze them for a few hours, before you toss them in a ziploc.  This way, the berries don't get smushed together.  Genius!

Thursday, August 11, 2011

What's For Lunch?

If my daughter could have her wish, she would live off peanut butter and jelly sandwiches for the rest of her life.  And with the discovery of having that concoction on a bagel (when I ran out of bread the other day), she now refers to it as a donut.

But there's got to be an occasional thing now and then, to break up that kind of monotony.

Now, I'm not a cook, and I don't claim to be.  But there is something that I wanted to share, that isn't the regular peanut butter and jelly, or the macaroni and cheese, that my daughter wants to have "just plain".

Toasted Cheese With A Little Protein

  • 2 slices of sourdough bread (or more, if you have more kids or want one for yourself)
  • I Can't Believe It's Not Butter Spray (because it's easy and fat-free)
  • Sliced deli meat (such as turkey, roast beef, etc.), torn into pieces
  • Parmesan Cheese
  • 1 (or more) slices of Swiss, Provolone, or whatever
  • Condiments (if your child's pallet is up to it) like honey mustard, etc.
In a non-stick pan, melt the parmesan into the meat slices.  Afterward, add to the bread (with the ICBINB spray on the sides), and the sliced cheese.  Continue to cook as you would a regular grilled cheese until you have something that ends up like this.  (And mind you-- I'm not going to display it like you'd see it in a magazine, because I was having a five year old asking me why I was taking photos of her food, and the fact that by doing so, it was going to get cold.)


This tends to throw the extra oomph of protein in my daughter's diet, so that she doesn't appear to be as malnourished as her little ribs seem to make her as.  (She just has this insanely fast metabolism that is not at all from my side of the family, and has me totally jealous!)  But add crackers or carrot sticks, and you have something that is quick and satisfying!

Tuesday, August 9, 2011

One White Tee Saved!

When I thought of having daughters, I envisioned little girls, running freely through a sunny field, giggling and happy, as they played amongst the Downy-fresh clothes, hanging on the clothesline.

Instead, I got the ones who would march through the front door with red popsicle stains running down their arms and dripping on the brand new white tees that hadn't even been on them longer than a half hour!  (By the way, you think that by having a 16-year old, I would have learned my lesson with the younger one.  But those happy, giggly, little visions...)

That's when I came across this little discovery the other day, that made me give a little gasp of hope in the aisle of the freezer section:

I was absolutely floored when I saw this.  Mini-- and more than 3 flavors?  Of course, I had to take these home and check them out.  Albeit, when I opened the package, they were a little smaller than I had expected.  But that's okay.  The full-sized ones got wasted anyways. And on top of this, they take forever to melt.  So by the time it even starts to drip-- it's already gone, where your kiddo is asking for another!
I haven't heard an "oops-- I'm sorry" yet, and haven't had to wash anything ten times, having to use four different stain removers.  So I think these are a really good bet!

Monday, August 8, 2011

Making New Memories Out Of Ones In Boxes


When my mother passed away (a little over 14 1/2 years ago), one of her possession that I was left with was a plastic bag of doll furniture.  I remembered them as a child, because my mother would pull them out whenever she was cleaning out her closet.  She would put the furniture out on the bed, whereas, aside from that, I was not allowed to touch them beyond her supervision.

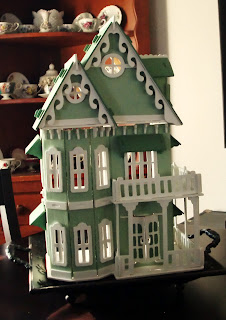
With this dollhouse roll going on, I ended up getting another one at Michaels the other day.  I thought with this one, I could bring out the furniture, and display it in the rooms for my daughter to look at.  And once again (sans child), I threw this one together, not even venturing into the buttons and whatnots.


Of course I had to get another one, because the perfectionist in me, isn't too pleased with the outcome.  (I just wasn't too enthused in the embellishments, after spending two hours trying to figure out how this all fit together.)

There are kids who are destructive (which I say in the most enduring way, because it didn't occur to me when my teenager was younger, to perform such a feat like this).  And then there's other kids-- like her sister, who have a more calmer disposition and whom I can see taking special care in her play.  And it's not like that's a bad thing.  It's just the nature they are born with.  (Such as the spiteful one, concerning my teenager, that made me delete her from my facebook account the other day!)

Saturday, August 6, 2011

And Not Bring Our Daughter????


The last time my husband and I had a "date" together, was in the summer of 2007. My husband suggested that we drop the kids over at his mother's house and go out to watch a movie. The concept seemed foreign. Not take the kids with us?

Nonetheless, we went out for a couple hours, taking in the movie "23". And while I sat there, mulling over an apology to my husband, as this was one of the worst movies I had ever seen-- yet this was what I suggested, I started to feel guilty. I realized that I had just wasted over $20 on something that I could have spent on the kids instead.

But lately, I've been getting burnout. Burnout from just making the bills, and not being able to do something fun with my husband-- ever. It seems that whenever time does come up, where my mother-in-law offers to watch the kiddo (currently, it is now "kiddo", as my teen is finishing school at her father's), that we have nothing to show for it. It always comes down to laundry, cleaning the house, grocery shopping, getting the oil changed, etc. with the little luxury of being able to accomplish those them without tiny feet underfoot.  In the end, we were more exhausted than we were when she had left!

That's when I decided to check out this site called Get My Perks (http://www.getmyperks.com/)  I've heard about it before, but was kind of reluctant in seeing what it was all about.  (I mean, after all, I am a martyr for my family!)

Get My Perks offers gift certificates for businesses in your area at half price-- or rather half the guilt.  After seeing what kind of deals they had to offer, I decided to get a pair of $30 Mt. Hood Railroad scenic tour tickets that regularly sells for $64.  And what's great about these certificates, is that they don't expire until a year later.  So when the sitter bails, or something of that nature comes up, it's not like you've lost your chance.

So I think we'll redeem these passes in the fall, when the autumn foilage lines the tracks.  It seems like something nice that my husband and I can enjoy together to reconnect.  (Don't mention to him though, that they also had 1/2 priced restaurant deals which meant 1/2 priced drinks!  That compared to a 5 hour train ride and apple picking in the crisp fall air?  Like I said, don't mention that part to him!)  And with this website, it is totally family friendly, so perhaps we can start enjoying our family as a family-- without all the expense involved!

Tuesday, August 2, 2011

Once Upon A Time...


I want everyone to know on here, that my daughter is a 5-year old prodigy. She is the only child I know, who counts Arsenic and Old Lace as her favorite movie. And the only one I know, who can actually sit through a story (lacking a lot of illustrations), without getting up, running a lap around the house, asking "when we're done, can I watch Spongebob".

With this doll thing she has going on, it was her idea to come to me with this book, asking me to start reading it to her. And I can't really describe the warm feeling that it gives, when you are able to read a story aloud, and have your child laugh at the way your voice animates it, asking you to repeat that part again. And on top of that-- beg you to read another chapter before they go to bed!

Last month, I started reading The Doll People, the first of a three-part series, written by Ann M. Martin and Laura Godwin. It's about a family of Victorian-era dolls, who have been passed in the home through a couple of generations. The main doll, Annabelle, is the daughter doll, who goes on an adventure in search of her Aunt Sarah-- another doll who went missing 50 years before.

We finished that book. And the moment we did, my daughter grabbed the 2nd in the series, and asked me if I could read just a chapter from that before going to bed. (That book is called The Meanest Doll In The World, where The Runaway Dolls is book number three.)

Nonetheless, it's a great feeling to find that bond with your child, where you can spend some time together that would otherwise be wasted, watching cartoon reruns, if you ended up telling them they had a half hour left before bedtime.

Monday, August 1, 2011

Amazingly Easy Low-Fat Cinnamon Rolls


Lucky for me, I was not born with the metabolism of my 5-year old daughter and husband.  I cannot scarf down half a cheesecake, jump on the sofa for ten minutes, and then look in the mirror, suck in my gut, and have my ribs stick out like Skeletor.

After seeing the label on Pillsbury Cinnamon Rolls (and saying "HELL NO" when I saw Cinnabon's nutrition thing on their website), I decided to improvise on some of my own.  I can't plaster butter on a slab of dough with a clear conscience-- or arteries at that matter.  So after experimenting with some I Can't Believe It's Not Butter Spray, I came up with this.  (And from what I've been able to come up with, they come in at 1.5g's of fat for each one, although it might be one or two more, depending on their size.)

And for those of you who don't bake, they are sooooooo easy to make!  If you don't have a pastry mat (or have one-- but just don't want to go through having to clean it up afterward), just tape some parchment paper on the countertop, and flour the surface with it.  When you're done, all you have to do is wad the paper up and throw it away.  Plus, it's just a one-bowl recipe, so it's even less of a mess to clean up!)

Kimberley's Amazingly Easy Low-Fat Cinnamon Rolls

1.  In a bowl, combine Reduced Fat Bisquick baking mix, with fat-free milk.  Get a dough forming; not too thick, and not too sticky.

2.  Roll out into a rectangle shape on a Bisquick dusted surface.

3.  Instead of butter, spread  I Can't Believe It's Not Butter SPRAY on the entire surface of the dough.  Sprinkle as much as you want of the cinnamon and sugar, until it is covered.

4.  Roll up, slice, and place into baking dish at 400°F for about 15 minutes, making sure the center rolls aren't gooey.  (And if you don't have a baking dish, putting them out on a cookie sheet will do as well.  (Line it with parchment paper, and you won't even have to dirty the pan!)

5.  In a ziploc (I recommed ziploc, because if you are having your kiddo help, it prevents a major mess of frosting dropping onto your floor out of the other end, followed by an "oops!  I'm sorry"), load your frosting in one corner.  Grabbing the ziploc like a pastry bag, make a small snip in the corner, and swirl the frosting all over the rolls as desired.

You can also add raisins into the sugar cinnamon mixture, as well as frozen raspberries, etc., pictured below.  But since I have a really finicky 5-year old, she likes them just made with the cinnamon, because any extras such as fruit, would make them too "healthy" for her, gawd forbid! :)